Getting Started with Metasploit
First things first. If you haven't installed Metasploit yet, check out
these instructions if you're a commercial user. Check out this
pageif you're a Framework user. Otherwise, if you already have Metasploit installed, congratulations! You've come to the right place to get started.
About Metasploit
Metasploit is a penetration testing platform that enables you to find, exploit, and validate vulnerabilities. The platform includes the Metasploit Framework and its commercial counterparts: Metasploit Pro, Express, Community, and Nexpose Ultimate.
Metasploit Framework
The Metasploit Framework is the foundation on which the commercial products are built. It is an
open source project that provides the infrastructure, content, and tools to perform penetration tests and extensive security auditing. Thanks to the open source community and Rapid7's own hard working content team, new modules are added on a regular basis, which means that the latest exploit is available to you as soon as it's published.
There are quite a few resources available online to help you learn how to use the Metasploit Framework; however, we highly recommend that you take a look at the
Metasploit Framework Wiki, which is maintained by Rapid7's content team, to ensure that you have the most up to date information available.
Metasploit Pro and Other Commercial Editions
The commercial editions of Metasploit, which include Pro, Express, Community, and Nexpose Ultimate, are available to users who prefer to use a web interface to pentest. In addition to a web interface, some of the commercial editions provide features that are unavailable in the Metasploit Framework.
Most of the additional features are targeted towards automating and streamlining common pentest tasks, such as vulnerability validation, social engineering, custom payload generation, and bruteforce attacks.
If you are command line user, but still want access to the commercial features, don't worry. Metasploit Pro includes its very only console, which is very much like msfconsole, except it gives you access to most of the features in Metasploit Pro via command line.
All features documented are available in Metasploit Pro. Certain features may not be available in other editions. For a comparison of features available in different editions, check out this handy page that breaks down the features in each edition.
Metasploit Implementation
Rapid7 distributes the commercial and open source versions of Metasploit as an executable file for Linux and Windows operating systems.
You can download and run the executable to install Metasploit Pro on your local machine or on a remote host, like a web server. Regardless of where you install Metasploit Pro, you can access the user interface through a web browser. Metasploit Pro uses a secure connection to connect to the server that runs it.
If you install Metasploit Pro on a web server, users can use a web browser to access the user interface from any location. Users will need the address and port for the server that Metasploit Pro uses. By default, the Metasploit service uses port 3790. You can change the port that Metasploit uses during the installation process. So, for example, if Metasploit Pro runs on 192.168.184.142 and port 3790, users can use https://192.168.184.142:3790 to launch the user interface.
If Metasploit Pro runs on your local machine, you can use localhost and port 3790 to access Metasploit Pro. For example, typehttps://localhost:3790 in the browser URL box to load the user interface.
Metasploit Pro Components
Metasploit Pro consists of multiple components that work together to provide you with a complete penetration testing tool. The following components make up Metasploit Pro.
Metasploit Framework
The Metasploit Framework is an open source penetration testing and development platform that provides you with access to the latest exploit code for various applications, operating systems, and platforms. You can leverage the power of the Metasploit Framework to create additional custom security tools or write your own exploit code for new vulnerabilities. The Metasploit team regularly releases weekly updates that contain new modules and bi-weekly updates that contain fixes and enhancements for known issues with Metasploit Pro.
Modules
A
module is a standalone piece of code, or software, that extends functionality of the Metasploit Framework. Modules automate the functionality that the Metasploit Framework provides and enables you to perform tasks with Metasploit Pro.
A module can be an exploit, auxiliary, payload, no operation payload (NOP), or post-exploitation module. The module type determines its purpose. For example, any module that opens a shell on a target is an exploit module.
Services
Metasploit Pro runs the following services:
- PostgreSQL runs the database that Metasploit Pro uses to store data from a project.
- Ruby on Rails runs the web Metasploit Pro web interface.
- Pro service, or the Metasploit service bootstraps Rails, the Metasploit Framework, and the Metasploit RPC server.
Web Interface
A web interface is available for you to work with Metasploit Pro. To launch the web interface, open a web browser and go tohttps://localhost:3790.
Command Line Interface
The Pro Console enables you to interact with Metasploit Pro from the command line.
Understanding Basic Concepts and Terms
To familiarize you with Metasploit Pro, the following are some basic terms and concepts that you should understand:
- Auxiliary module: A module that does not execute a payload. Examples of auxiliary modules include scanners, fuzzers, and denial of service attacks.
- Bind shell payload: A shell that attaches a listener on the exploited system and waits for a connection to the listener.
- Database: The database stores host data, system logs, collected evidence, and report data.
- Discovery scan: A discovery scan is a Metasploit scan that combines Nmap and several Metasploit modules to enumerate and fingerprint targets.
- Exploit: A program that takes advantage of a specific vulnerability and provides an attacker with access to the target system. An exploit typically carries a payload and delivers it to a target. For example, one of the most common exploits is MS08-067, which targets a Windows Server Service vulnerability that could allow remote code execution.
- Exploit module: A module that executes a sequence of commands to exploit a vulnerability on a system or application to provide access to the target system. In short, an exploit creates a session. Exploit modules include buffer overflow, code injection, and web application exploits.
- Listener: A listener waits for an incoming connection from either the exploited target or the attacking machine and manages the connection when it receives it.
- Meterpreter: An advanced multi-function payload that provides you an interactive shell. From the Meterpreter shell, you can do things like download a file, obtain the password hashes for user accounts, and pivot into other networks. Meterpreter runs on memory, so it is undetectable by most intrusion detection systems.
- Module: A standalone prepackaged piece of code that extends the functionality of the Metasploit Framework. A module can be an exploit, auxiliary or post-exploitation module. The module type determines its purpose. For example, any module that can open a shell on a target is considered an exploit module. A popular exploit module is MS08-067.
- Payload: The actual code that executes on the target system after an exploit successfully compromises a target. The payload enables you to define how you want to connect to the shell and what you want to do to the target system after you take control of it. A payload can be a reverse shell payload or a bind shell payload. The major difference between these payloads is the direction of the connection after the exploit occurs.
- Post-exploitation module: A module that enables you to gather more information or to gain further access to an exploited target system. Examples of post-exploitation modules include hash dumps and application and service enumerators.
- Project: A container for the targets, tasks, reports, and data that are part of a penetration test. A project contains the workspace that you use to create a penetration test and configure tasks. Every penetration test runs from within a project.
- Reverse Shell Payload: A shell that connects back to the attacking machine as a command prompt.
- Shell: A console-like interface that provides you with access to a remote target.
- Shellcode: The set of instructions that an exploit uses as the payload.
- Task: An action that Metasploit can perform, such as scanning, exploiting, and reporting.
- Workspace: The same thing as a project, except it's only used when referring to the Metasploit Framework.
- Vulnerability: A security flaw or weakness that enables an attacker to compromise a target. A compromised system can result in privilege escalation, denial-of-service, unauthorized data access, stolen passwords, and buffer overflows.
Metasploit Pro Workflow
The overall process of penetration testing can be broken down into a series of steps or phases. Depending on the methodology that you follow, there can be anywhere between four and seven phases in a penetration test. The names of the phases can vary, but they generally include reconnaissance, scanning, exploitation, post-exploitation, maintaining access, cleaning up, and reporting.
The Metasploit Pro workflow can be tailored based on the various phases of penetration testing. Generally, the workflow includes the following steps:
- Create a project: Create a project to store the data collected from your targets.
- Gather information: Use the discovery scan, Nexpose scan, or import tool to supply Metasploit Pro with host data that can be used to identify vulnerabilities and access The scan discovers fingerprints and enumerates services on hosts.
- Exploit: Use auto-exploitation or manual exploits to launch attacks against known vulnerabilities and to gain access to compromised targets.
- Perform post-exploitation: Use post-exploitation modules or interactive sessions to gather more information from compromised targets. Metasploit Pro provides you with several tools that you can use to interact with open sessions on an exploited machine. For example, you can view shared file systems on the compromised target to identify information about internal applications and use the collection feature to gather system passwords and hashes.
- Bruteforce: Run bruteforce attacks to test collected passwords against services to find valid logins.
- Clean up open sessions: You can close open sessions on an exploited target to remove any evidence of any data that may be left behind on the system. This step restores the original settings on the target system.
- Generate reports: Create a report that details your findings. Metasploit Pro provides several report types that you can use to customize the report data. The most commonly used report is the Audit Report, which provides a detailed look at the hosts and credentials captured in the project.
Accessing Metasploit Pro from the Web Interface
To access the web interface for Metasploit Pro, open a browser and go to https://localhost:3790 if Metasploit Pro runs on your local machine. If Metasploit Pro runs on a remote machine, you need to replace localhost with the address of the remote machine.
To log in to the web interface, you will need the username and password for the account you created when you activated the license key for Metasploit Pro. If you can't remember the password you set up for the account, you'll need to
reset your password.
Supported Browsers
If the user interface is not displaying all of its elements properly, please make sure that you are using one of the supported browsers listed below:
- Google Chrome 10+
- Mozilla Firefox 18+
- Internet Explorer 10+
- Iceweasel 18+
Accessing Metasploit Pro from the Command Line
The Pro Console provides the functionality of Metasploit Pro through a command line interface and serves as an alternative to the Metasploit Web UI. If you have traditionally been a Metasploit Framework user, the Pro Console provides you with something similar to msfconsole.
You can use the Pro Console to perform the following tasks:
- Create and manage projects.
- Scan and enumerate hosts.
- Import and export data.
- Configure and run modules.
- Run automated exploits.
- View information about hosts.
- Collect evidence from exploited systems.
You cannot perform all Metasploit Pro tasks through the Pro Console. Tasks that are not supported include reporting, social engineering, running MetaModules, configuring task chains, running bruteforce attacks, and scanning web applications.
Launching the Pro Console on Windows
To launch the console on Windows, select Start > Metasploit > Metasploit Console.
You can also start the console from the command line. To launch the console from the command line, enter the following:
$ cd /metasploit
$ console.bat
Launching the Pro Console on Linux
To launch the console on Linux, open a terminal and run the following:
$ cd /opt/Metasploit/
$ sudo msfpro
Touring the Projects Page
Now that you are familiar with some of the basics of Metasploit, let's take a more in depth look at Metasploit Pro.
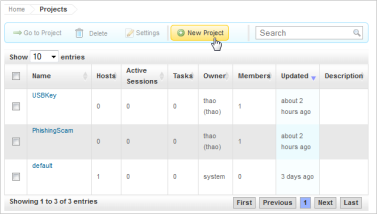
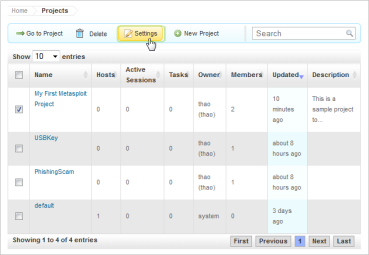
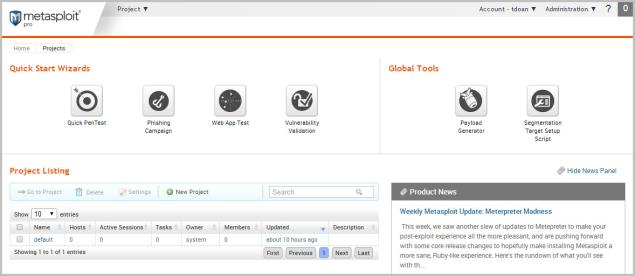
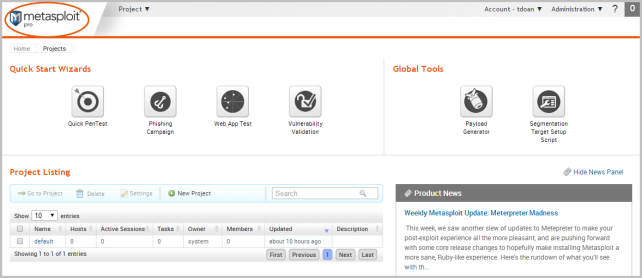
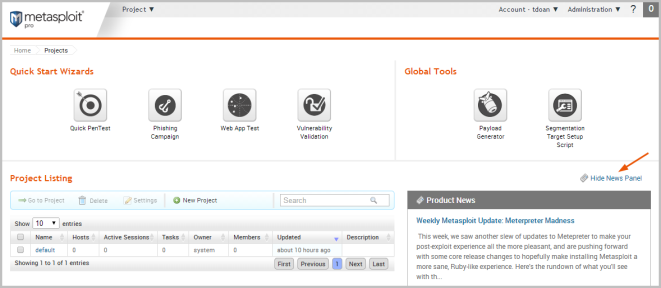
After you log in to Metasploit Pro, the first screen that appears is the Projects page. The Projects page lists all of the projects that are currently stored in the Metasploit Pro instance and provides you with access to the quick start wizards, global tools, and product news.
Regardless of where you are in the application, you can select Project > Show All Projects from the Global toolbar or click on the Metasploit Pro logo to access the Projects page, as shown below:
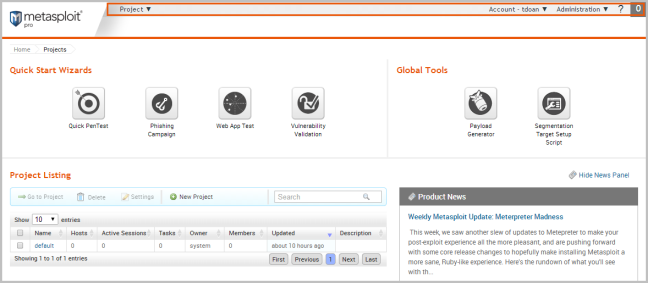
Global Toolbar
The Global toolbar is located at the top of web interface. This toolbar is available from anywhere in Metasploit Pro. You can use the Global toolbar to access the Projects menu, your account settings, and the Administration menu.
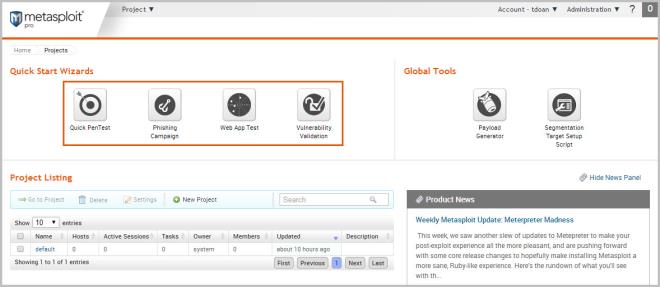
Quick Start Wizards
Each quick start wizard provides a guided interface that walks you through a common penetration testing task, such as scanning and exploiting a target, building social engineering campaigns, scanning and exploiting web applications, and validating vulnerabilities.
You can click on any of the quick start wizard icons to launch its guided interface.
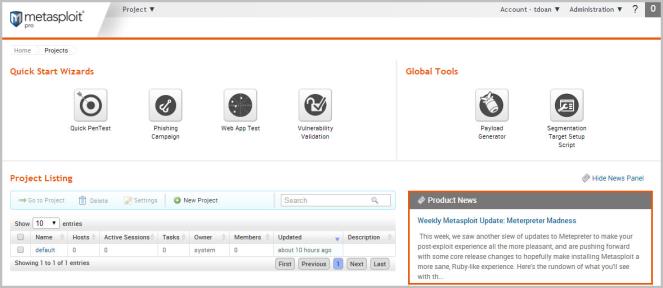
Product News
The Product News shows you the most recent blogs from Rapid7. If you want to keep up with the newest modules and security news from Rapid7 and the community, the Product News panel is a great place to check for the latest content.
If for some reason, you don't want to see the Product News panel, you can hide it so that it does not display on the Projects page.
Creating a Project
Now that you're familiar with the Projects page, let's actually create a project.
A project contains the workspace, stores data, and enables you to separate an engagement into logical groupings. Oftentimes, you will have different requirements for the various subnets in an organization. Therefore, it may be efficient to have multiple projects to represent those requirements.
For example, you may want to create a project for the human resources department and another project for the IT department. Your requirements for these departments may vary greatly, so it would be logical for you to separate the targets into different projects. At the end of the engagement, you can generate separate reports for each department to perform a comparative analysis and present your findings to the organization.
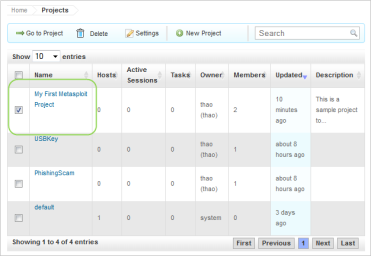
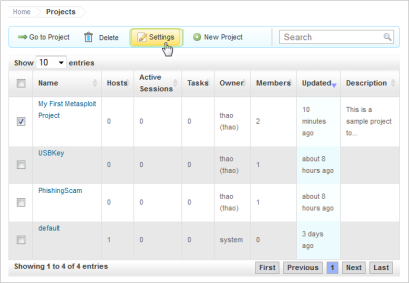
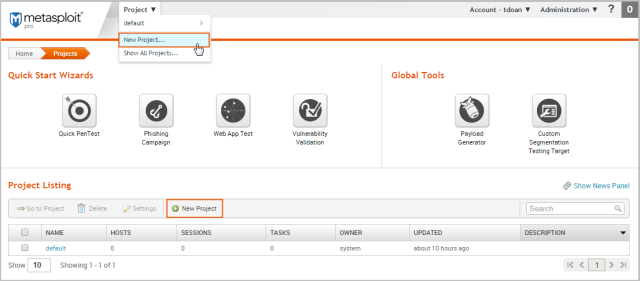
Creating a project is easy. You can click on the New Project button on the Projects page or you can select Project > New Projectfrom the global toolbar.
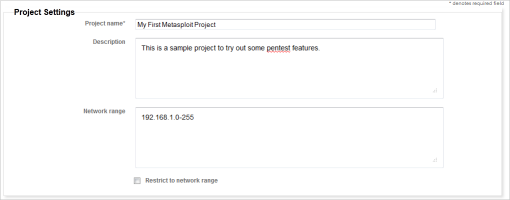
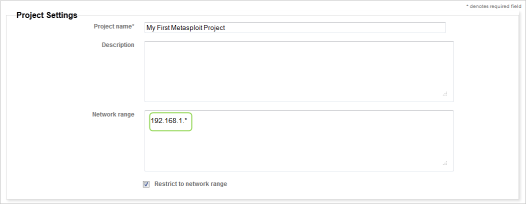
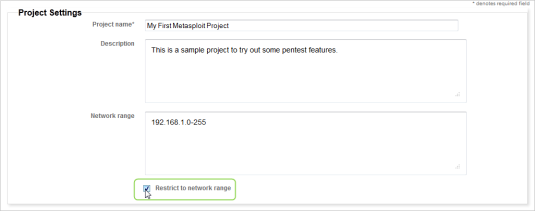
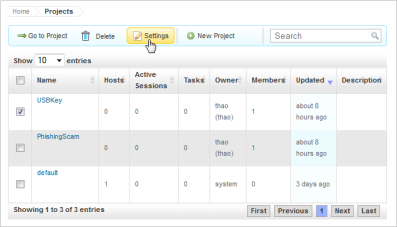
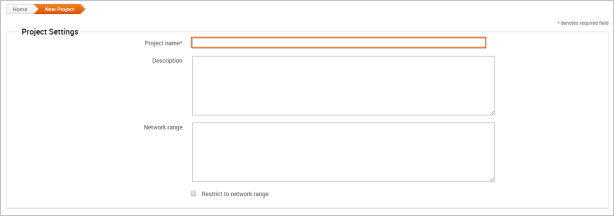
When the New Projects page appears, you only need to provide a project name. If you want to customize the project, you can also add a description, specify a network range, and assign user access levels.
Want to learn more about projects? Check out this
page.
Getting Target Data
The next thing you want to do is add data to your project. There are a couple of ways you can do this:
- Run a discovery scan
- Import data you already have
Scanning Targets
Scanning is the process of fingerprinting hosts and enumerating open ports to gain visibility into services running within a network. Scanning enables you to identify the active systems with services that you can communicate with so that you can build an effective attack plan. Metasploit has its own built-in discovery scanner that uses Nmap to perform basic TCP port scanning and gather additional information about the target hosts .
By default, the discovery scan includes a UDP scan, which sends UDP probes to the most commonly known UDP ports, such as NETBIOS, DHCP, DNS, and SNMP. The scan tests approximately 250 ports that are typically exposed for external services and are more commonly tested during a penetration test.
During a discovery scan, Metasploit Pro automatically stores the host data in the project. You can review the host data to obtain a better understanding of the topology of the network and to determine the best way to exploit each target. Oftentimes, the network topology provides insight into the types of applications and devices the target has in place. The more information that you can gather about a target, the more it will help you fine-tune a test for it.
Running a discovery scan is simple. From within a project, click the Scan button.
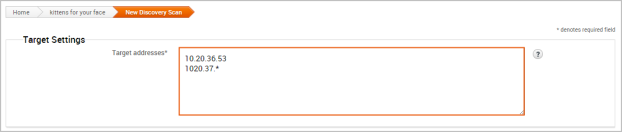
When the New Discovery Scan form appears, enter the hosts you want to scan in the Target addresses field. You can enter a single IP address, an IP range described with hyphens, or a standard CIDR notation. Each item needs to appear on a newline.
You can run the scan with just a target range; however, if you want to fine-tune the scan, you can configure the advanced options. For example, you can specify the hosts you want to exclude from the scan and set the scan speed from the advanced options.
Want to learn more about discovery scans? Check out this
page.
Importing Data
If you are using a vulnerability scanner, you can import your vulnerability report into a Metasploit project for validation. The imported vulnerability data also includes the host metadata, which you can analyze to identify additional attack routes. Metasploit supports several third-party vulnerability scanners, including Nessus, Qualys, and Core Impact.
You can also export and import data from one Metasploit project into another. This enables you to share findings between projects and other team members.
To import data into a project, click the Import button located in the Quick Tasks bar. When the Import Data page appears, select either the Import from Nexpose or Import from File option. Depending on the option you choose, the form displays the options you need to configure to import a file.
For example, if you choose to import from Nexpose, you will need to choose the console you want to use to run a scan or import a site. If you choose to import a file, you will need to browse to the location of the file.
To see a full list of supported import types or to learn more about importing,
check out this page.
Viewing and Managing Host Data
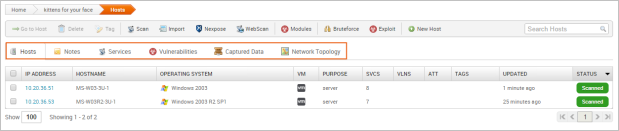
You can view host data at the project level or at the host level. At the project level, Metasploit provides a high-level view of all hosts that have been added to the project. To access the project view, select Analysis > Hosts. The project view initially shows the Hosts list, which displays the fingerprint and enumerated ports and services for each host. You can also view all the notes, services, vulnerabilities, and captured data for the project. To access these other views, click on their tabs from the project view.
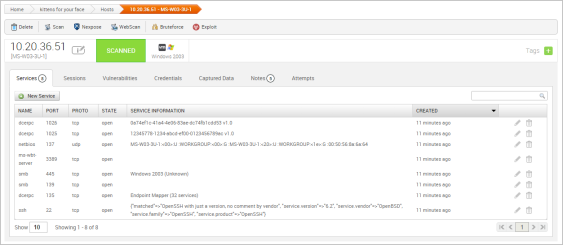
To view the granular details for a host, you can click the host's IP address to access the single host view. This is a good way to drill down to see the vulnerabilities and credentials for a particular host.
Running a Vulnerability Scan
After you add target data to your project, you can run a vulnerability scan to pinpoint security flaws that can be exploited. Vulnerability scanners leverage vulnerability databases and checks to find known vulnerabilities and configuration errors that exist on the target machines. This information can help you identify potential attack vectors and build and attack plan that will enable you to compromise the targets during exploitation.
The integration with Nexpose enables you to launch a vulnerability scan directly from the Metasploit web interface. A Nexpose scan identifies the active services, open ports, and applications that run on each host and attempts to identify vulnerabilities that may exist based on the attributes of the known services and applications. Nexpose discloses the results in a scan report, which you can share with Metasploit for validation purposes.
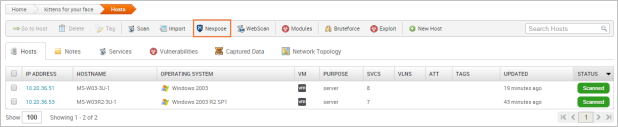
To run a Nexpose scan, click the Nexpose button located in the Quick Tasks bar.
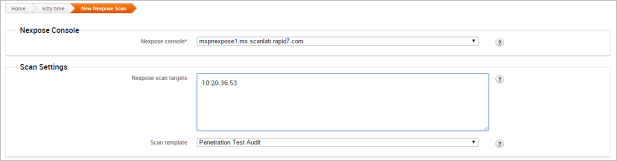
When the Nexpose configuration form appears, you need to configure and select the console you want to use to perform the scan. Similarly to a discovery scan, you need to define the hosts you want to scan. You'll also need to choose one of the available scan templates, which defines the audit level that Nexpose uses. For more information on scan templates, check out the
Nexpose User Guide.
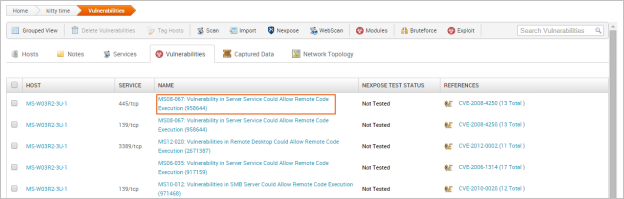
To view all potential vulnerabilities that found by Nexpose, select Analysis > Vulnerabilities. You can click on the vulnerability name to view the modules that can be used to exploit the vulnerability.
This information becomes handy in the next phase of the pentest: exploitation.
Vulnerability scanners are useful tools that can help you quickly find potential security flaws on a target. However, there are times when you may want to avoid detection and limit the amount of noise you create. In these cases, you may want to run some auxiliary modules, such as the FTP, SMB, and VNC login scanners, to manually identify potential vulnerabilities that can be exploited. Manual vulnerability analysis is considerably more time consuming and requires research, critical thinking, and in-depth knowledge on your part, but it can help you create an accurate and effective attack plan.
Finding and Exploiting Vulnerabilities the Easy Way
The easiest way to scan and check for vulnerabilities is through the Vulnerability Validation Wizard, which automates the validation process for Nexpose and Metasploit Pro users. The wizard provides a guided interface that walks you through each step of the validation process—from importing Nexpose data to auto-exploiting vulnerabilities to sending the validation results back to Nexpose.
If you don't have access to Nexpose and/or Metasploit Pro, the validation process requires manual analysis of the vulnerabilities. Manual validation requires a bit more legwork, but provides much more control over the vulnerabilities that are targeted.
For more information on vulnerability validation, check out this
page.
Exploiting Known Vulnerabilities
After you have gathered information about your targets and identified potential vulnerabilities, you can move to the exploitation phase. Exploitation is simply the process of running exploits against the discovered vulnerabilities. Successful exploit attempts provide access to the target systems so you can do things like steal password hashes and download configuration files. They also enable you to identify and validate the risk that a vulnerability presents.
Metasploit offers a couple different methods you can use to perform exploitation: auto-exploitation and manual exploitation.
Auto-Exploitation
The auto-exploitation feature cross-references open services, vulnerability references, and fingerprints to find matching exploits. All matching exploits are added to an attack plan, which basically identifies all the exploits that are can be run. The simple goal of auto-exploitation is to get a session as quickly as possible by leveraging the data that Metasploit has for the target hosts.
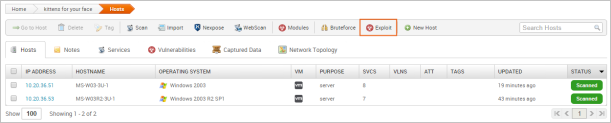
To run auto-exploitation, click the Exploit button located in the Quick Tasks bar.
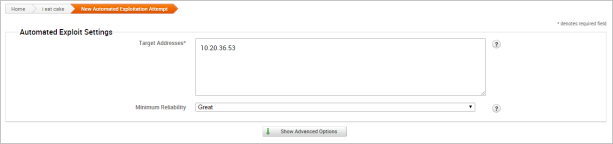
At a minimum, you'll need to provide the hosts you want to exploit and the minimum reliability for each exploit. The minimum reliability can be set to guarantee the safety of the exploits that are launched. The higher the reliability level, the less likely the exploits used will crash services or negatively impact a target. For a description of each module ranking,
check out this page.
Manual Exploitation
Manual exploitation provides a more targeted and methodical approach to exploiting vulnerabilities. It enables you to run select individual exploits one at a time. This method is particularly useful if there is a specific vulnerability that you want to exploit. For example, if you know that the SMB server on a Windows XP target does not have the MS08-067 patch, you may want to try to run the corresponding module to exploit it.
To search for modules, select Modules > Search and enter the name of the module you want to run. The best way to find an exact module match is to search by vulnerability reference. For example, if you want to search for ms08-067, you can either search for 'ms08-067'. You can also search by the module path: exploit/windows/smb/ms08_067_netapi.
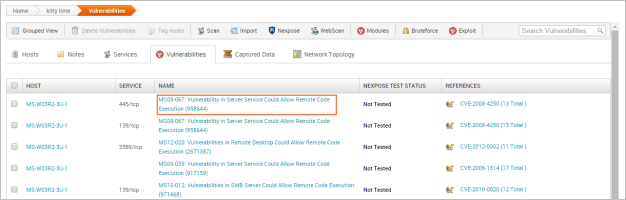
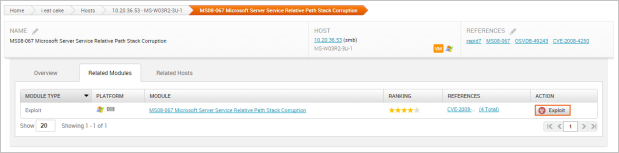
One of the easiest ways to find an exploit for a vulnerability is directly from the vulnerability page. To view all vulnerabilities in the project, select Analysis > Vulnerabilities. You can click on the vulnerability name to view the related modules that can be used to exploit the vulnerability.
The single vulnerability view shows a list of the exploits that can be run against the host. You can click the Exploit button to open the configuration page for the module.
Configuring Common Exploit Module Settings
Each module has its own set of options that can be customized to your needs. There are too many possibilities to list here. However, here are some options that are commonly used to configure modules:
- Payload Type: Specifies the type of payload that the exploit will deliver to the target. Choose one of the following payload types:
- Command: A command execution payload that enables you to execute commands on the remote machine.
- Meterpreter: An advanced payload that provides a command line that enables you to deliver commands and inject extensions on the fly.
- Connection Type: Specifies how you want your Metasploit instance to connect to the target. Choose one of the following connection types:
- Auto: Automatically uses a bind connection when NAT is detected; otherwise, a reverse connection is used.
- Bind: Uses a bind connection, which is useful when the targets are behind a firewall or a NAT gateway.
- Reverse: Uses a reverse connection, which is useful if your system is unable to initiate connections to the targets.
- LHOST: Defines the address for the local host.
- LPORT: Defines the ports that you want to use for reverse connections.
- RHOST: Defines the target address.
- RPORT: Defines the remote port you want to attack.
- Target Settings: Specifies the target operating system and version.
- Exploit Timeout: Defines the timeout in minutes.
Post-Exploitation and Collecting Evidence
Any exploit that successfully takes advantage of a vulnerability results in an open session you can use to extract information from a target.The real value of the attack depends on the data that you can collect from the target, such as password hashes, system files, and screenshots and how you can leverage that data to gain access to additional systems.
To view a list of open sessions, select the Sessions tab. Click on the session ID to view the post-exploitation tasks that can be run against the host.
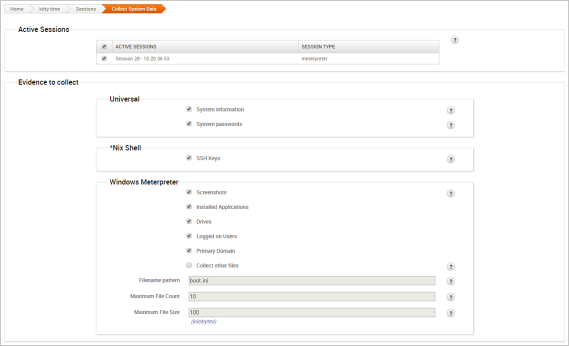
To collect evidence from an exploited system, click the Collect button.
A list of all open sessions displays and shows you the type of evidence that can be collected.
Cleaning Up Sessions
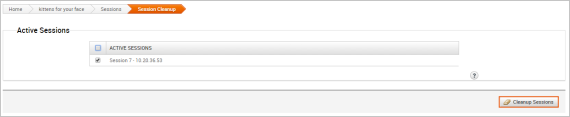
When you are done with an open session, you can clean up the session to remove any evidence that may be left behind on the system and to terminate the session. To clean up a session, go to the Sessions page and click the Cleanup button.
When the Session Cleanup page appears, select the sessions you want to close and click the Cleanup Sessions button.
Generating a Report
At the end of the pentest, you'll want to create a deliverable that contains the results of your pentest. Metasploit provides a number of reports that you can use to compile test results and consolidate data into a distributable and tangible format. Each report organizes your findings into relevant sections, displays charts and graphs for statistical data, and summarizes major findings.
For more information on reports, check out this
page.